Table of Contents
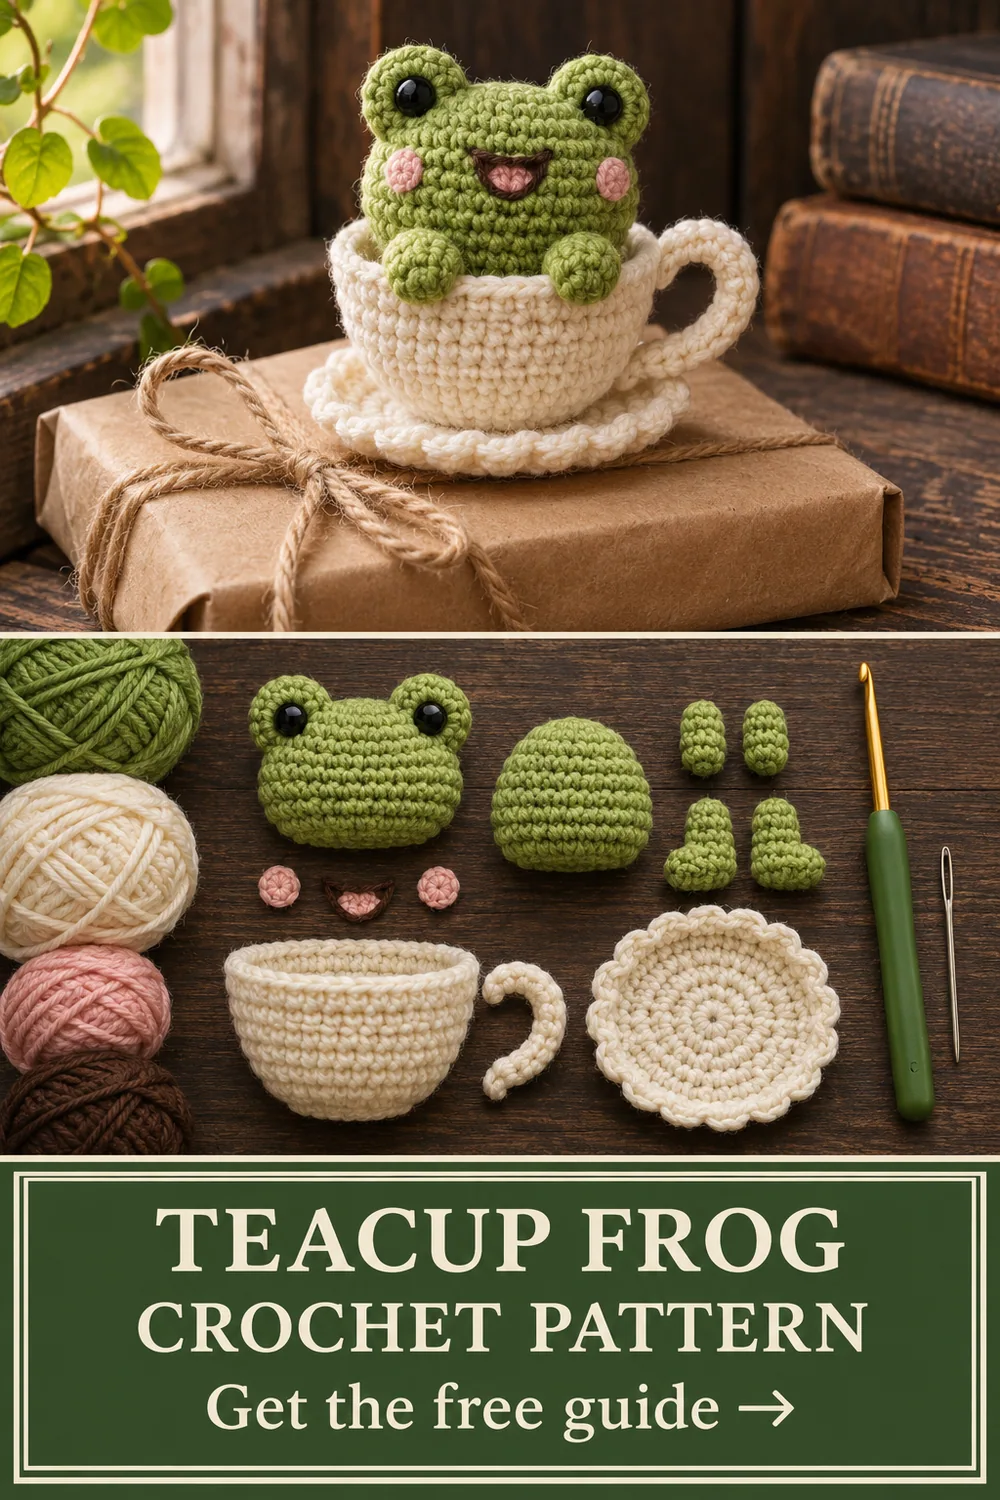
A little frog peeking above a cream teacup rim, with a decorative side handle is the basis of this Teacup Frog crochet pattern. Counted body rounds, separate animal parts and an intentional themed accent give the character its shape. Build the silhouette first, then check detail placement with pins. Finished size changes with yarn weight, hook size and tension.
Materials and US crochet abbreviations
Gather smooth DK yarn in cream, leaf green and blush pink, a hook that gives a dense fabric (often around 3 mm), light stuffing, a stitch marker, a yarn needle and embroidery thread. Make a small swatch: if filling shows through, try a smaller hook. Use matching yarn weights for the base and the accents.
US terms: sc = single crochet, ch = chain, sl st = slip stitch, hdc = half double crochet, inc = two single crochets in one stitch, and invisible dec = work the front loops of two stitches together. Work continuous rounds unless a part says to turn; numbers in parentheses give final round counts.
Crochet the teacup
Cup: R1 6 sc in a magic ring (6); R2 inc around (12); R3 [sc, inc] six times (18); R4 [2 sc, inc] six times (24); R5 sc in back loops only (24) to turn the wall; R6–9 sc around (24). Add a rim of loose slip stitches and leave the opening wide enough for the frog.
Move your marker to the first stitch on every round and check each shaping count before proceeding. Add filling gradually while the opening is large enough to reach the corners. A small toy keeps its silhouette more clearly when the fabric is dense but the filling is not forced through the stitches.
Build the animal silhouette
Frog head: make rounds of 6, 12, 18 and 24 sc. Work three even rounds at 24; decrease to 18, then 12 and 6 before closing with light stuffing. Eye bumps: 6 sc in a ring and one even round at 6 each. Handle: ch 12, sc back across 11 chains.
Lay the pieces against the body and look at the shape from the front and side. Matching appendages should be equal length before sewing; rework a misplaced increase rather than stretching one part to match its partner.
Crochet the themed detail
A flat green tea circle starts with 6 sc, increases to 12 and then 18. Sew it inside the cup below the frog so a little green shows at the edges; add one blush stitch to each cheek.
This design combines a little frog peeking above a cream teacup rim, with a decorative side handle. Keep the accent secondary to the animal face: test its position with removable pins and compare it to the finished project image. Sew through full loops to make the detail secure.
Sew the parts and embroider the face
Reinforce the handle at both rim and lower wall; it is decorative, not a lifting point. Sew the frog through the cup base, keeping its eye bumps above the rim. Work through the body fabric instead of only catching the stuffing, change direction when weaving in ends and pull the seams just firm enough to hold the shape. Embroider eyes and other small features if the item will be handled by a child.
Fix a common shaping problem
If the frog sinks, add a little filling below its head and resew through the lower frog round. Reinforce a drooping handle with a second row of sc. If a seam puckers, take out just the last few stitches and redistribute the filling before resewing. Recheck the front-facing silhouette after every attachment rather than hiding a problem under another accent.
Make a variant and care for the piece
Make the cup light blue with a cream rim and leave the frog leaf green. A change of colour does not change stitch counts if the replacement yarn matches the weight and texture. Follow the yarn label for washing, spot-clean gently if needed and let the filled item dry completely before storage.
For a second hybrid idea, compare Avocado Dinosaur and Cherry Blossom Bunny. They use different animal silhouettes and accents.
Frequently asked questions
How many stitches shape the Teacup Frog?
The teacup base reaches 24 stitches before the upright wall rounds. Count each shaping round before sewing.
What detail makes this Teacup Frog recognizable?
A flat green tea circle starts with 6 sc, increases to 12 and then 18. Keep the animal outline visible when you attach it.
When should I attach the Teacup Frog parts?
Reinforce the handle at both rim and lower wall; it is decorative, not a lifting point. Pin everything first and secure matching seams.
Can I recolor the Teacup Frog?
Make the cup light blue with a cream rim and leave the frog leaf green. Keep the same yarn weight and stitch counts.