Table of Contents
- Christmas crochet pattern materials and abbreviations
- Before you start: color and scale
- Crochet the main ornament piece
- Make the Christmas accent pieces
- Sew, stuff and attach the hanger
- Make it your own and fix common issues
- Display, storage and care
- More woodland Christmas crochet ideas
- Frequently asked questions
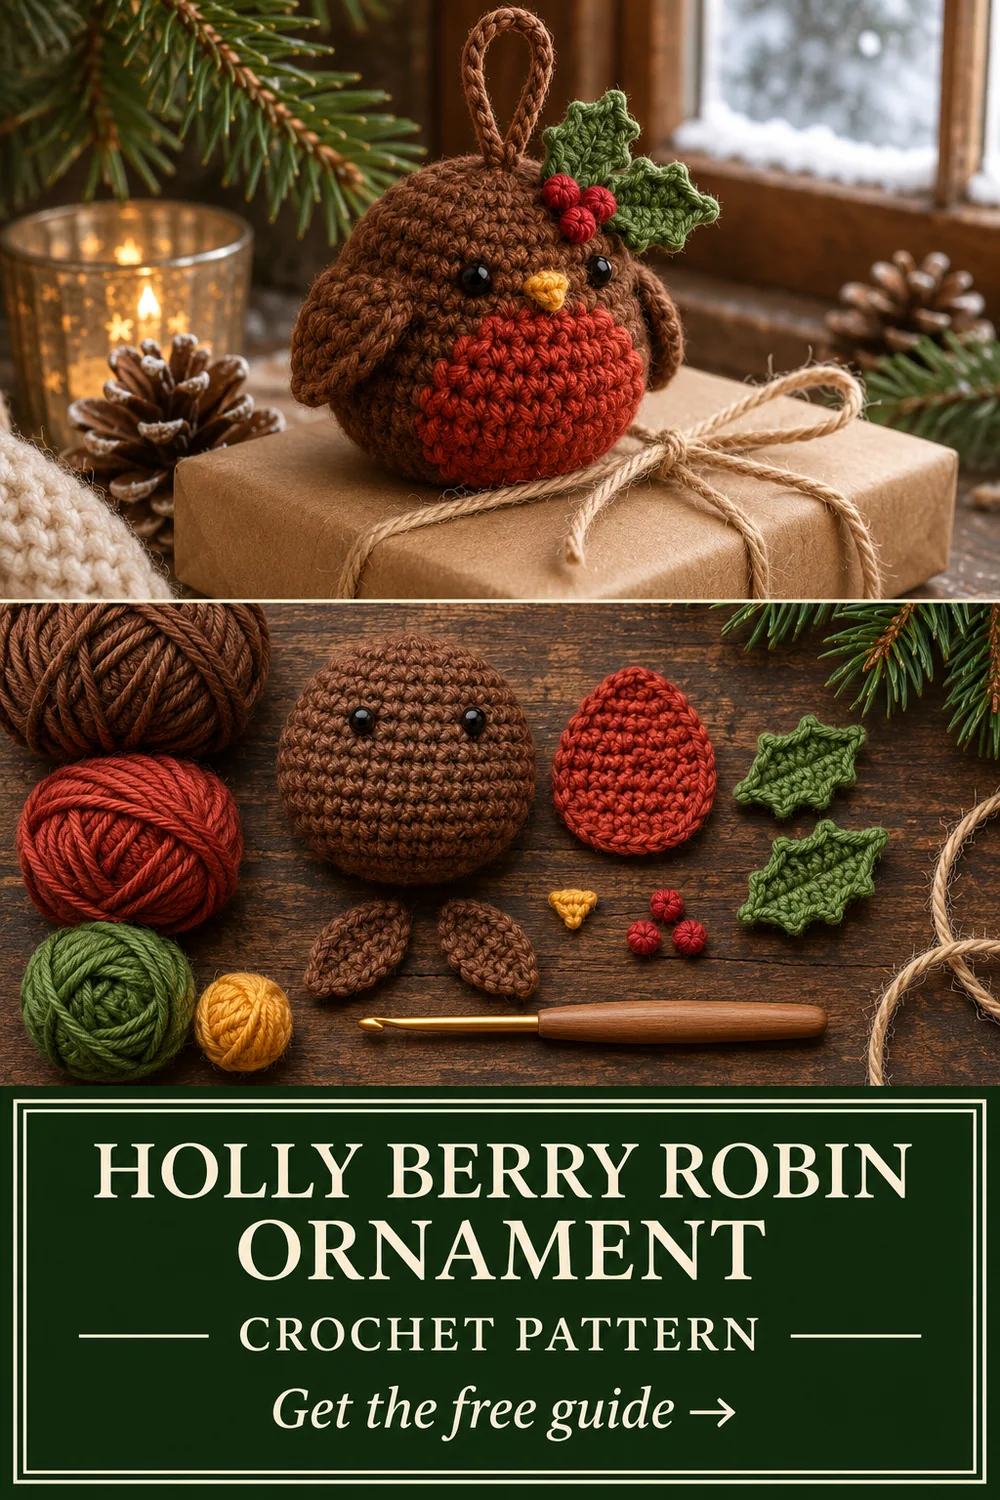
This holly berry robin christmas ornament joins our rustic Christmas crochet patterns for small handmade gifts and tree decorations. A chestnut oval carries a terracotta breast patch. Two small green leaves and three tiny embroidered berries sit on the side, leaving the beak and dark embroidered eyes easy to see. Follow the written rows or rounds below, then use the assembly notes to make it hang straight. The sample is a compact ornament; its exact size depends on yarn, hook and your tension.
Christmas crochet pattern materials and abbreviations
Gather chestnut, terracotta, holly green and berry red DK yarn, 3 mm hook, a stitch marker, light stuffing, embroidery thread, tapestry needle and hanging yarn. Use a hook small enough to make a firm fabric. US terms: ch = chain, sc = single crochet, sl st = slip stitch, hdc = half double crochet, dc = double crochet, inc = two sc in one stitch, invisible dec = single crochet the front loops of two adjacent stitches together. R denotes a round; Row means turn at the end. The number in parentheses is the count at the end of that instruction.
Try a few stitches in your chosen yarn before beginning. If the fabric has gaps, use a smaller hook; if the yarn squeaks or the edge puckers, relax your tension. Always recount after an increase or decrease round.
Before you start: color and scale
Pin the red patch onto the front before stuffing the final rounds. Leave a narrow chestnut border visible around it. Place the holly cluster behind one eye, never directly above the beak, so the robin still reads as a bird. Lay the yarn and any natural materials on a table in daylight to check their contrast. Keep the hanging loop in a matching shade so it does not distract from the motif. For a set of five ornaments, the same yarn weight makes the pieces look related even if the shapes differ.
Make one complete ornament first and record its finished height. Yarn weight and hook size change the measurement more reliably than changing just the stuffing. Avoid adding a rigid component to pieces that will be handled by small children.
Crochet the main ornament piece
Body in chestnut: R1 6 sc in a magic ring (6). R2 inc around (12). R3 [sc, inc] six times (18). R4 [2 sc, inc] six times (24). R5 [3 sc, inc] six times (30). R6–10 sc around (30). R11 [3 sc, invisible dec] six times (24). R12 [2 sc, invisible dec] six times (18). R13 [sc, invisible dec] six times (12). Stuff lightly. R14 invisible dec six times (6) and close.
Take a moment to compare the front and back if your design uses flat panels. Pin alignment points before you sew; on a piece worked in rounds, move the marker at the start of each round. Count after shaping so the next section starts with the intended number of stitches.
Make the Christmas accent pieces
Breast in terracotta: ch 5, sc into second ch, sc in next 2 ch, 3 sc in final ch; turn work and sc on underside of next 2 ch, then 2 sc in last ch (10). For the second oval round, inc in the first stitch, sc in next 2, inc in each of next 3, sc in next 2, inc in each of last 2 stitches (16). Slip stitch and leave a tail.
The robin body uses single crochet increases and invisible decreases; a small flat sc oval creates the red breast. Pointed holly leaves mix slip stitch, sc and half double crochet on both sides of a foundation chain. Stitch the smallest details in a contrasting color if they need to stand out. Finish and weave in each short yarn end as soon as a piece is complete; otherwise the ends can make the seam bulky.
Sew, stuff and attach the hanger
Holly leaf, make two: ch 6. From second ch work sl st, sc, hdc, sc, sl st; chain 1 around the tip and work sl st, sc, hdc, sc, sl st back along the opposite side. Sew the breast to the front. Stitch two dark eyes, a tiny orange V beak, two side holly leaves and three red embroidered berry knots. Chain 24 at the crown and secure the hanger.
Sew on the breast and embroidered eyes before the top becomes hard to reach. Pin the holly behind one side, secure each leaf by its stem, and embroider the berries over the stems. Hang from the top center and check the robin faces forward. Hold the ornament by its loop for several seconds, then turn it to the side. Move the loop slightly before weaving in its tails if the motif leans. Secure the yarn on the hidden face with stitches that pass through the fabric, not just the stuffing.
Make it your own and fix common issues
Use a wool-look yarn for a softer woodland robin, or replace holly with a single snowflake stitched in ivory. Keep tiny accents embroidered instead of using glued miniatures that could loosen. Keep the written counts the same for a color change. If you change yarn weight, make all the pieces in that new weight and test how the finished ornament hangs.
If the breast buckles, use a smaller hook for the patch and sew its outside loops without pulling tight. If the robin tilts on the branch, move the loop one stitch toward the heavier holly cluster and test-hang again. If an edge still curls after you adjust the tension, gently reshape the piece on a towel. Do not press a hot iron on acrylic or filled pieces. Check seams and small decorations before wrapping a gift.
Display, storage and care
Hang the piece away from open flame and heavy moisture. To store it after Christmas, tuck the ornament loosely in tissue rather than compressing any raised stitches. If it includes a natural element, let it dry completely before storing and check it for wear before putting it back on the tree.
For a cohesive handmade set, pair this motif with the other woodland Christmas ornaments on the site. A shared palette of pine green, cream and warm brown ties different shapes together without making every ornament identical.
More woodland Christmas crochet ideas
Keep making a coordinated tree set with these related ornaments and explore our crochet ideas collection:
- Rustic Cinnamon Stick Christmas Tree
- Snow-Dusted Fir Christmas Tree
- Pinecone Owl Christmas Ornament
- Gingerbread House Christmas Ornament
Frequently asked questions
Where does the red breast go on the crochet robin?
Sew the sixteen-stitch terracotta breast oval over the front of the chestnut body, leaving a visible brown border and enough room above for its embroidered eyes.
Do I need plastic eyes or beads for the holly berries?
Use yarn details: two green leaves shaped around foundation chains, three red embroidered knots, and dark stitches for the eyes. No separate beads are required.
Why is my hanging robin turning sideways?
Fix the loop at the crown, then test the bird on a hook before weaving in the tails. The holly cluster adds weight on one side, so shift the loop slightly if it leans.
Can I change the holly leaves to another winter accent?
Yes. Keep the same thirty-stitch-wide robin body and replace the side holly cluster with a small ivory embroidered snowflake, keeping the face unobstructed.